Tuesday, November 11, 2008

Apple Cinnamon Tart

Since I had so much apples and cookie dough left over, I just throw some cookie dough onto the bottom of the pan, place the apples on top and rolled out the rest of the dough. With a leaf cookie cutter from Wiltons, I was able to make these 3 leaf cut outs and place them on top of my apple tart. Also, being that I ran out of vanilla extract, I just used rum instead. This is just something that's warm, easy and simple to make on a nice cold day.

Sugar Cookie Recipe:

1 cup butter, softened
2 1/2 cup all-purpose flour
1 1/2 cup sugar
1 1/2 tsp baking powder
1/4 tsp salt
1 egg
1 tsp vanilla extract
1 tbsp cinnamon
1 tsp nutmeg


1. Beat butter for 30 seconds, add sugar, baking powder, and salt.
2. Beat in egg and vanilla
3. Beat in as much flour as you can with a mixer.
4. Divide dough in half, refrigerate for an hour or 2, wrapped in plastic.
5. Preheat oven to 375 degrees
6. Roll out dough onto a well floured surface, and use any cookie cutter to cut out the shapes desired.
7. Bake for about 10 to 15 minutes or until golden brown. Bake for about 20 to 25 minutes when using the dough as topping and crust for your pie. Let cool and Enjoy!

*This cookie dough recipe is different then my other sugar cookie recipes, this one requires more butter and the out come is more fluffy, soft and cake like. Rather then crispy and hard.

Apple Filling:


2 Granny Smith Apples- peeled, cored, and diced/chopped small
1/4 cup Sugar
1 tbsp Cinnamon
1 tsp Nutmeg
1 tbsp Rum (dark or light)

1. Peel, core, and dice the apples into small pieces. Place medium saucepan over low heat and place apples, sugar, cinnamon, nutmeg, and rum into the pot. Stir all ingredients together for about 1 to 2 mintues until well coated, then cover and let cook for about 8 mintues or to your liking.
2. Once done to your taste and texture, remove from heat and let completely cool.

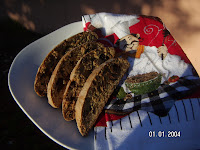
Apple Cinnamon Biscotti Cookies

What can you do with 5 Apples? Well with 2 apples I made these Apple Cinnamon Biscotti like cookies. I peeled, cored, and diced 2 apples, and by doing so I was able to make 3 mini Apple Cinnamon Rum Loafs and these Apple Cinnamon Biscotti Cookies. I actually wanted to make pinwheel cookies, but after rolling out the dough into a rectangle and spreading the apple filling evenly throughout the rectangle and rolling it into a log, I decided to just bake it as is and cut them after they bake. This is very easy, and all I did was use a basic cookie recipe. So really its more cookie then biscotti, just with a biscotti shape. If you would like to try, this is a recipe from my other post called Mini Apple Sugar Cookie Pie. I used lefted over cookie dough to make these cookies.


Apple Filling:


2 Granny Smith Apples- peeled, cored, and diced/chopped small
1/4 cup Sugar
1 tbsp Cinnamon
1 tsp Nutmeg
1 tbsp Rum (dark or light)
1. Peel, core, and dice the apples into small pieces. Place medium saucepan over low heat and place apples, sugar, cinnamon, nutmeg, and rum into the pot. Stir all ingredients together for about 1 to 2 mintues until well coated, then cover and let cook for about 8 mintues or to your liking.
2. Once done to your taste and texture, remove from heat and let completely cool.

Wednesday, October 29, 2008

Halloween Graveyard Cake (Easy)


This is an easy cake to make for Halloween and fun to do it with your kids. You can find this recipe at:
Halloween Graveyard Cake From Cooksrecipes

Candy Corn Cookies From Betty Crocker

Along with the Spooky Brownies, I also found this recipe on Betty Crocker, and I think its super cute but might be a little difficult then the brownies. But if you are interested in trying these cute cookies that will definitely be an attention getter, you can find the recipe at:
Candy Corn Cookies From Betty Crocker

Spooky Halloween Betty Crocker Brownies

As I was surfing the web for Halloween/Fall theme recipes, I found a few recipes on BettyCrocker.com that I thought would be great for anyone to do, and if your on a budget. This is an easy easy recipe, you can make for your Halloween party or kids. I love brownies and I think it is an easy and decorative project for anyone who may feel that you have to go to pastry school to produce decorative desserts.
Spooky Brownies From Betty Crocker

Sunday, October 12, 2008

JIFFY Pineapple Yellow Cake!

Yesterday, it rained all day so I was home and looking for something to keep me busy, when I decided to bake. I love all JIFFY mix, from corn muffins to their lemon cake. I wanted to try something different with Jiffy's yellow cake mix, and first I was thinking maybe I should try to make cookies out of the mix, but then I found some crushed pineapple and a can of pineapple juice in my pantry, and left over cherry syrup from a bottle of cherries I had. However, I still wanted to stay away from making a cake, so I made the recipe into bars, more or less the same thing and topped it off with cherry buttercream. I do wish I had some cherries, and pecans to finish it off. There is two ways to make this recipe, one way is where I added flour to the jiffy yellow cake mix and another way where you can follow the jiffy recipe on the box and subsuite water for pineapple juice, mix in about 1/4 cup of granulated sugar, and stir in about 1/4 to 1/3 cups of crushed pineapple to your liking. If you use my recipe, the cake will be heavy.


My Recipe
1 box of JIFFY Yellow Cake mix
1 cup of all-purpose flour
1 egg
3/4 cup of Pineapple Juice
1/4 cup granulated sugar
1/4 cup crushed pineapple
2 tbsp cooking oil


Cherry Buttercream
1 stick of unsalted butter (room tempature)
3/4 cup sifted confectioners sugar
1 to 2 tbsp cherry syrup


1. In a large bowl, mix egg, cooking oil, and pineapple juice until combined. Add sugar, and beat well.
2. Add the jiffy yellow cake mix and all-purpose flour, to the wet mixture and mix until smooth. Then stir in the crushed pineapples.
3. Preheat oven to 350 degrees and grease an 8x8 squared pan. If you have some extra pineapples you can also sprinkle them on top of the batter. Bake for about 30 minutes or until light brown. Let cool, cut into bars and enjoy!
1. For Cherry buttercream, beat all ingredients in a small bowl with electric beaters until smooth and creamy. Spread over the entire cake.


JIFFY Recipe
1 box of JIFFY Yellow cake mix
1/2 cup of Pineapple juice
1 egg
1/4-1/3 cup of crushed pineapples

1/4 cup granulated sugar
1. Follow the directions of the jiffy mix, subsituting water for pineapple juice, and mix in crushed pineapples. Pour batter in an 8x8 squared pan, bake as directed, let cool, frost with the cherry buttercream frosting and cut into bars. Enjoy!

Thursday, October 9, 2008

HALLOWEEN Sugar Cookies!


October is Halloween month, and these are my first Halloween cookies for the month. I must admit, I did have some trouble with the icing, and I think that is because I was missing corn syrup and meringue powder. The corn syrup makes it nice and glossy and the meringue powder makes the icing dry hard. I used a basic sugar cookie recipe that I have been using for a few years now. This is not hard to make at all, as far as the recipe that's easy and decorating the cookies is very fun and anyone can do it. I am usually stocked, however I did run out of piping bags, so I used my last three zip lock bags by snipping off the tips. At least the theme of these cookies is Halloween, because they are kind of messy and the color is a little off. But it was fun, and easy to do. I used a set of Wilton Icing Colors, which you can find at Wilton.com and if you want to try this project but do it very quick and simple, you can also buy Ready To Use White Cookie Icing by Wilton, I bought mines at Walmartin the bridal/craft section. With the ready to use icing, all you would need to do is warm it up in your microwave and add any color of your choosing. So lets begin, here's the sugar cookie recipe I used:


2 cups sifted all-purpose flour, plus more for work surface
1/4 tsp of salt
1/2 tsp baking powder
1/2 cup unsalted butter (1 stick)
1 cup sugar
1 large egg
1 tsp vanilla extract


1. In a large bowl, sift flour, salt, and baking powder together and set aside.
2. Cream butter and sugar together on medium speed until light and fluffy, about 3 minutes. Add egg, mix well. Reduce speed and add flour mixture until well combined. Stir in vanilla. Wrap dough in plastic and refrigerate until cold, about 45 minutes.
3. Preheat oven to 325 degrees. Roll out chilled dough, on a well floured surface to a little more then 1/8 thick. Cut out shapes and place 2 inches apart on baking sheet.
4. Bake cookies for about 10 to 12 minutes or golden brown. Let cool and enjoy.


Royal Icing


4 cups of confectioners sugar
5 tsp marshmallow or meringue powder
5 or 6 tbsp water
Flavor to taste
1. Beat all ingredients at low speed for 10 minutes until icing forms peaks.
* Don't be afraid to add more water if needed or if to much water add some more powdered sugar.

CINNAMON Roll Knock-Up!


This is what I call a knocked up job of Cinnamon Rolls. As a student living in a studio, money, space, and lighting are limited resources, so bare with me lol. Usually when I want something sweet and homemade, I go rummaging through my pantry and grab hold of whatever I can find. So luckily for me I had all-purpose flour, cinnamon, sugar, yeast, and powered sugar. Then I scanned through some recipes and decided to make cinnamon rolls, however the recipe asked for bread flour and another recipe also asked for plain white flour, so hey! at least I had most of the required ingredients. One thing I did learn is that, improvising is cool but following a recipe thoroughly is better, because my cinnamon rolls came out kind of heavy.. not so light and fluffy. But when your looking for a knock up job consisting of something sweet this is the way to go. OK so here's the real recipe not my knocked up cinnamon rolls.


1 pkg active dry yeast
3/4 cup warm water
1/4 cup white sugar
3/4 tsp salt
1 egg, room temperature
2 1/2 cups Bread flour, sifted


Filling:
1/4 cup butter, softened
1 Tbsp ground cinnamon
1/2 cup brown sugar


1. Dissolve the dry yeast in warm water, let stand until creamy about 10 minutes
2. Combine the yeast with sugar, salt, egg, and 1 cup of flour, stir well until combined.
3. Stir in the remaining 1/2 cup of flour at a time, beating well with each addition. When the dough pulls together place on top a floured surface and knead until smooth and elastic, 8 minutes. Cover and let rest 10 minutes or let rest over night.
4. Roll out dough into somewhat of a rectangle and now combine the filling mixture, brown sugar and ground cinnamon. Brush the dough with the melted butter and sprinkle the brown sugar mixture over the entire dough. Now roll dough length wise into a log and pinch edges.
5. Cut the dough into 16 pieces and place cut side up in a 8x8 squared pan. Cover pan with plastic wrap and let rise at room temperature until double in size, about 45 minutes.
6. Preheat oven 400 degrees. Bake rolls until golden brown and Enjoy!

Wednesday, October 1, 2008

Review 1: The Cake Bible

The Cake Bible is the ultimate book for beginners to experts. In great detail, this bible explains everything you would need to know from frosting's, custards, fillings, sauces, mouses, fruit toppings and purees to a variety of cakes and tortes. Here you can find the base of a cake recipe and add your own twist. I love buttercream frosting, and the cake bible gives you a few classic buttercream base recipes and then gives you alternatives to add to the recipe. For example, you have now finished mixing your vanilla buttercream frosting, but then you decided you would like to make it chocolate or make a raspberry buttercream, this book gives you the ingredients needed to add to your already existing base. I have had my book for a few years now, it was my mothers cookbook and now here I am the proud owner of, "The Cake Bible". This is definitely something you can pass on to your kids. Even though it does not carry much pictures, it is a straight forward book that gets right down to baking. Attempting to bake for 50 to 100 people, don't be scared because the cake bible is here, and gives you cake recipes in quantities for almost any amount. If your an everyday dessert seeker like me, you can purchase the cake bible at My Amazon Shopping List where my mom got hers and also I created a little store where you can find almost all baking products needed to create jumbo cupcakes, lemon cake mix cookies, and more.

Chocolate Chip Cookie Bars 1

My friends love Chocolate chip cookies, almost every week I must have cookies made for them. So this week was the week for me to make some and I just got tired of the same old cookies. What I decided to do was make the same recipe but make them into bars, less work and taste more like a cake cookie bar so to speak. Now this recipe is the base for an original chocolate chip cookie, however if you love cherries (as much as I do), pecans, walnuts, semi-sweet chocolate, milk chocolate, and oatmeal you can add these items and anything else you love, which will make such a nice soft bar.. But don't forget the chocolate chips, its the base of the recipe. This is only one bar recipe out of many, as they say, "The Skies The Limit".

1 cup (2 sticks) butter, softened
3/4 cup granulated sugar
3/4 cup packed light brown sugar
1 tsp vanilla extract
2 eggs
2-1/4 cups all-purpose flour
1 tsp baking soda
1/2 tsp salt
2 cup Hershey's Milk Chocolate Chips
1 cup chopped nuts (optional)
1/2 cup roughly chopped cherries (optional)
1/4-1/2 cup instant oatmeal (optional)
1. Preheat oven to 375F

2. Beat butter, granulated sugar, brown sugar and vanilla in a large bowl, until creamy. Then add eggs, mix well. Stir together flour, baking soda, and salt; gradually add to the creamed mixture, mixing until well blended. Stir in chocolate chips, saving 1/4 cup and stir in optional items, saving a few handfuls, if desire.
3. In a squared 8" pan or larger, spread the dough evenly throughout the pan, then sprinkle the rest of the chocolate chips over the top and the few handfuls of optional items over the top as well.
4. Bake for about 25-40 minutes at 375F, it depends on your oven. Usually I check them at 25 minutes and leave them to brown for 10 to 15 minutes.
5. Let cool and Enjoy!

Monday, September 29, 2008

WHITE Cake Mix Cookies Part 2

In my last post, I made Lemon cookies from a lemon cake mix. So I decided to try the same recipe, with a White Cake mix to simulate sugar cookies, and also to see if this recipe would be better when making sugar cookies with a little add and minus here and there. These cookies came out prefect, they were rich and soft. One review I got said, "the cookies are moist, rich and missing a glass of milk". Now, here is a quick and simple recipe for cookies that can be transformed into any flavored or type of cookie. Pecans, chocolate chip, all chocolate, and hazelnuts are just a few ideas, from dozens. Find all your baking needs at Brilliantcakes3000 ONLINE STORE

LEMON Cake Mix Cookies

Whenever I bought the Pillsbury Lemon cake mix, there would always be a recipe on the side of it. So this recipe that I tried, is called "Lemon Crisps". However I hate dried out hard cookies, so what I did was take a small spoon and shape the dough into balls, instead of flatting them out like the recipe says, I just left them as balls. Also, after mixing the ingredients together, I let the dough rest for about an hour or two. Because when i did attempt to make them right way, the lemon seemed really strong and it was as if you were eating straight sugar. You could taste the granules.

1 pkg Pillsbury Moist Supreme Lemon cake mix
1/3 cup Oil
2 eggs
1/4 cup sugar
1 cup powdered sugar
2 to 3 tbsp lemon juice
1. Preheat oven to 375F. In a large bowl, combine cake mix, oil, and eggs; stir with spoon until combined into a moist dough. Shape dough into 1-inich balls and place 2 inches apart on cookie sheet.
2. Bake at 375F for 5 to 10 mintues or until edges are golden brown. Cool 1 mintue and remove from cookie sheet.
3. Small bowl, combine powdered suger and lemon juice until smooth and drizzle over cookies. You can also dust the cookies with the powder sugar. Enjoy!
Find and enjoy your favorite baking needs to recreate this recipe and others at THE STORE

Sunday, September 28, 2008

JIFFY Corn Muffin Ideas!

Got any JIFFY Ideas? I do! An all American favorite can be made in so many ways. I love this corn muffin mix, and here's a few ideas I have to make it even better.

Savory Recipe) 1-2 JIFFY corn muffin mixes
1/2-1Tbsp of Cilantro
1/2-1Tsp of Chili powder
Dash of Salt
Dash of Black pepper
1/3 Cup of Red Pepper
1/3 Cup of Green Pepper
1/2 Tsp of Onion powder
1/2-1 Cup of Monteray Jack Shredded Cheese

Mix all dry ingredients together, and then follow the recipe (twice if using two mixes) for the Jiffy corn muffin mix. Then add the shredded cheese and let the mix rest as stated on the box, after that bake at the required temperature in a round or squared baking pan. Enjoy!
Sweet Recipe) 1-2 JIFFY corn muffin mix
1-2 Tbsp of granulated Sugar
5 Tbsp of any kind of Jam
Follow the recipe on the box, plus add sugar, mix and let rest. Place in a round or squared baking pan, and marble the jam of your chose throughout the mix. Bake as directed and Enjoy!
Sweet Recipe) 1-2 JIFFY corn muffin mix
1 can of cream of corn
2 Tbsp of granulated Sugar
1/3 stick of Butter
Dash of Salt

Combine dry ingredients and set aside. Mix together the wet ingredients from the box and the cream of corn and butter. Mix in the wet ingredients into the dry gradually, let rest then bake as directed in a round or squared baking pan, and Enjoy!

My Cookie Cutters!


Mrs.Cookie Cutters

As my passion grew for baking, and experimenting with different recipes, I started collecting cookie cutters. My favorite stores are Marshall's, Ross, Burlington and T.J. Max, where I find great cookbooks and baking items such as many different cookie cutters. I look for and buy all sizes, shapes, and designs. Usually every holiday, there's new cutters to look for. Currently, I have Valentines day, Halloween, and Christmas themes. I use my cutters for sugar cookie recipes. One day I was surfing the home decor isles of Ross, and found this huge gingerbread cookie cutter, I immediately secured it in my shopping kart. The best way to find either the same, different or even the matching piece to an already existing item is to go to all the same stores in different areas, close by. You would find me at almost all the locations closes to me, searching for cutters, dishes for display, and much more. Right now, I am on the search for some vintage cutters, I hope to find a great collection of vintage cutters. You can collect these cookie cutters and others like I have on My Amazon Shopping .

Thursday, September 4, 2008

Hazelnut-Chocolate Chip cookies

Ok, so I found this recipe on Epicurious.com.. as I said on Sunday, I was interested in making either brownies or oatmeal chocolate chip cookies. So I decided to make these Hazelnut Chocolate chip cookies that I found and I think the hazelnut added a great taste to ordinary chocolate chip cookies. Even though I make several not so healthy desserts, I do try to shop at Whole Foods, and purchase all my ingredients from them, then everything I bake is organic.

This recipe is great, and it was a hit at my little get together the other night.
1 1/2 all-purpose flour
3/4 tsp baking soda
1/2 baking powder
1/2 tsp salt
1/2 cup (1 stick) unsalted butter, room temp
1/2 cup sugar
1 cup creamy hazelnut butter
1/2 cup light brown sugar (packed)
1 large egg
1 tsp vanilla extract
2 cups semi sweet mini chocolate chips
1. Sift together flour,baking soda, baking powder and salt 2. Beat both butters and both sugars in a large bowl until light and fluffy, then beat in egg and vanilla. 3. Beat in the flour mixture and stir in the mini chocolate chips 4. Refrigerate dough for about 2 hours 5. Preheat oven to 350 degrees, line or grease 2 baking sheets. 6. You can use a tbsp or small ice cream scoop, arranging scoops of the dough 1-inch apart, and bake cookies one sheet at a time for about 12 minutes. Let cool and enjoy.

Sunday, August 31, 2008

Today's Grocery list & Baking Ideas

Today, I had the idea to make some brownies or chocolate chip oatmeal cookies, I am planning to take a trip to my local grocery store here in Miami,Fl. My pantry is more or less full, but I would like to get in on some Labor Day sales. However I always end up thinking of new or old favorite things to bake and cook. With the exception of a sale, my weekly shopping budget is only $60-$80 usually it consist of meat and poultry, vegetables,cooking oil, rice and etc. And then when theres a sale I buy in bulk so the rest of the weeks, I am only spending money on important items that run out very quickly.

Heres what I plan to buy;
Orange juice (gallon) only $2.49
Cranberry juice (gallon) $5.19 buy 1 get one free
Pepsi/Mountain Dew 4 12pk cans for $10.00 plus get one free
Cereal $4.09 buy 1 get one free ( am a huge cereal fan)
Milk$3.79 (gallon)
Eggs $1.79
Brownie Mix 2 for $4.00 ( this is only for storage, because I love to make my famous brownies from scratch)
Cherries
Walnuts
Chocolate chip morsels
Cocoa powder
Water 24pk $4.00

Luxurious Chocolate Cherry Cheesecake

2 Cream Cheese pkgs (8 oz.)
Sour Cream (16 oz.)
1 Cup Sugar
2 Eggs
3/4 Graham Cracker Crumbs
1/3 Chopped Walnuts or Pecans (optional)
1 Cup of Cherries (dried)
1 Teaspoon of Mint Extract (optional)
2 Tbsps of Flour
3 Tbsps of Butter (melted)
3 Tbsps of Sugar
Chocolate Fudge cake mix (plus required ingredients)

1. Preheat oven to 325 degrees. Line two deep pans with foil or parchment paper, with ends extended over pans.

2. Mix graham crumbs, 3 tbsps of sugar, and 3 tbsps of butter well.
3. Pack firmly into the bottom of pans and bake for about 10 minutes.

4. Cream cream cheese and sour cream, then add 1 cup of sugar and eggs. Then add flour, mint extract, walnuts or pecans, cherries and blend well.

5. Mix together the chocolate cake mix and its ingredients, then pour half (or even less then half)of the cake mix into one of the pans, and the other half in the other pan, (which has the baked graham crumbs). Eye ball it, because the chocolate cake has a tendency to run over.

6. Pour the cheesecake batter over the chocolate fudge cake batter of both pans.

7. Bake for 1 to an hour and a half, until center is set. Cool completely, lift cheesecake out with foil or parchment handles and serve.


* Not recommended for people on diets!

This was a very rich chocolate-cheesecake I created for Christmas and it was wonderful. You get the best of both worlds, its like ice cream and cake. Prep time might be an hour, but give it a try and enjoy.

Saturday, August 30, 2008

Cream Cheese Frosting

2 (8 oz) Pkgs of Cream Cheese (softened)
1/2 Cups of Butter, softened
2 Cups Sifted Confectioners Sugar
1 Teaspoon Vanilla Extract

1. Cream together cream cheese and butter until creamy.
2. Mix in vanilla, then gradually stir in the confectioners sugar.

*For an all white frosting, you can use the clear imitation vanilla extract.
This frosting goes good with some pecans or almonds sprinkled on top of cupcakes or on the side of your cake.

Chocolate Almond Biscotti Recipe

1 Cup of Almonds
3/4 Cup of Gramulated Sugar
3 Large Eggs
1 Teaspoon Pure Vanilla Extract
1 Teaspoon Baking Powder
2 Cups All-Purpose Flour
1/2 Teaspoon of Almond Extract
1 Cup Bittersweet Chocolate
1/2 Teaspoon Cinnamon

1. Preheat oven to 350 degrees
2. Whisk eggs and vanilla extract together, then set aside.
3. Beat flour, sugar, baking powder, salt, and cinnamon until combined.
4. Gradually add the egg mixture, chocolate, and almonds, then beat until a dough forms.
5. With floured hands and surface, divide dough in half.
6. Roll each dough into a log.
7. Transfer logs to a lined baking sheet.
8. Bake for 35-40 minutes, let cool and enjoy.

Saturday, May 3, 2008

Breakfast with Sophie!


My mom was a nurse, and she took care of a sweet but tough little old lady name sophie. Her name may sound soft, but she was far from it. But, from time to time I would visit and help out. My real interest in baking came from visiting sophie, (because I was more of a cook since I was 10 years old, rather then baking).

I got the idea that it would be nice to bake something for her.. she loved sweets and trying new things. So I first began with breakfast, where I baked Almond stuffed Pastry Pretzels. It was in the shape of a pretzel and lightly stuffed with a mixture of sugar, almonds, and almond paste. As they were baking the house filled with a sweet aroma, and she could not wait. She enjoyed it, for the next couple of mornings.

Then I made semi sweet cinnamon buns, with her heath in mind and for christmas I made cookies. Sophie really enjoyed the treats, and she wanted to help so bad sometimes. It was more of a treat to see her face when she started to smell different things baking.

Travels through memory lane..


This is when I was trying to do something different and make cupcakes to look like real people. If you ask me, they look a little to real..lol. The cupcakes were covered in buttercream, the eyes were made from fondant and the hair from buttercream also.
As you can see, all the pictures above are my first trials.. having no experience and just jumping right in.

Friday, May 2, 2008

My Trials and Errors...

I don't know if its only me, but usually when I go to the grocery store (mainly Walmart), I have a list, which I try sticking to.. but I always end up enhancing it. Lets say I decide to buy a box cake, the one where you just add water,oil, and eggs. Its either I might scrap that idea and go completely homemade or buy extra items to add to my box cake. *At this point, I honestly did not know that I could add apricot juice in stead of water, to a lemon cake.. which enhaces the flavor, and I usually toss in some sour cream so it can be extra moist. So by this time, when a cake was suppose to be 20 to 30 minutes, its now 45 to an hour of bake time. I must admit, walmart has a pretty good selection of things in their baking isle and Wilton section. And, the wilton section is another story, I purchased these over sized Jumbo cupcake pans and also bought wiltons fondant. Now as far as the knowledge of fondant goes, the only experience or closes I've gotten to it, was by watching the Food Network. But Im always up for a challenge, and anyhow, the box comes with directions.. lol.

FROM WIKIPEDIA, The ENCYCLOPEDIA
Fondant-
is basically sugar and water cooked to a certain point, cooled slightly and stirred or beaten until it is a creamy consistency. Fondant is a cream confection use for fillings, or coating for cakes, pastries, and sweets.

Well, the experience went good, you can add food color gel to the fondant, or you can buy already colored fondant. One thing that I know is that you can't wet it to much, and you have to knead in the color really well, and with a rolling pin, roll it out and cover cakes or cupcakes. Put it like this, its the adult version of Play Doh!


Above, are pictures of my green and blue fondant covered Jumbo cupcakes, the green one is decorated with green fondant leaves.. its suppose to be like grass and the butterfly on top is just doing what butterflies do. The next one, was suppose to represent the sky, and the cookie stars, are the stars in the sky, and the bear is just enjoying the midnight view. As far as the cupcakes, it was just a plain yellow cake, my main agenda was to experiment with the fondant and get accustomed to using it.

2007 Christmas Rush


Above are some pictures of Sugar cookies, which I made for christmas to give away to friends and family. Along with a mini Three layer Pecan and cherry, coconut buttercrem cake.
We have all experienced the Christmas rush and/or the Thanksgiving rush, where we spend hours in the kitchen cooking and baking, along with hours in the grocery stores.. battling over the last package or bottle of gravy, or the last bag of flour.

For 2007, I spent my time baking for three days straight. I began with the cookies, the first cookies I made was half chocolate and half vanilla with orange peel. They were the best things to hit the market. Those were the first items gone, to where I did not even remeber.. muchless have time to take a picture.. so next time! What followed after that was my sugar cookies, throughout this whole process, friends and family could not get one word out of me, I was in the zone.. The kitchen was like a jungle, and only the brave could enter. And as anyone who cooks or bakes knows that, your on a roll.. all your batches are coming out good and evenly brown, but from the time you attempt to get started on another project, there goes that bad batch.. where the cookies are over cooked.. but the show must go on. So, I had a few stumbbles, but who doesn't? As, my cookie escapade came to an end, then I got started, with my mini cakes, that was easy and only took one day to assemble and ice. I really enjoy baking, I never once felt tired or stressed, its more like baking is something that relaxes me and allows me to get creative.

Cookies Cookies Cookies!

Who doesn't love cookies? If there is someone out there that does not like cookies, then we all need to try to convert them. All and any cookie is a great cookie. Theres many different types of cookies, and/or styles of cookies.

Im some parts of the world, Biscuits are what we know them as, Cookies. Cookies basically were born from the method of taking little amounts of cake batter and dropping it onto baking pans to test the temperature of the oven. Cookies were catergorized by method, such as Drop cookies.. which is just spoonfuls of dough dropped onto a baking sheet. Cut out or Molded cookies, was from the use of a cookie cutter or shaping the dough to desired style before baking. Pressed cookies, are from the process of pressing the cookie dough through a press machine or pastry bag to form creative designs. And, there are many more methods to behold in the process of making cookies. Biscuits were small flat cakes, baked twice to keep them fresh and crisp.
FROM WIKIPEDIA, The ENCYCLOPEDIA
Cookie-
is a small, flat baked dessert. In most English speaking countries outside of North America, the common word is Biscuit.
What happens to most of us when we attempt to make cookies? Well first of all, you have a good cookie when it has an even golden color on both sides, and equal thick or thinness. When you have a bad cookie, it is either uneven in thick or thinness, it spreads to far out, uncooked and/or sticking to the tray, or over cooked.. to dark and hard. Many factors comes into play when you have a bad cookie.. usually it is either you did not allow enough room for it to spread, there might be to much sugar in the dough, or you did not mix the dough properly.

I've had cookies, that just wont rise, their as flat as a board or to hard because I may have measured the sugar wrong. But for now, my speciality is Sugar cookies, Jam Drops, Chocolate chip cookies, and Biscotti. Sugar cookies are simple.. once you find that perfect recipe, its all good from there.. you can use the recipe to make cut out cookies, drop, or pressed. If you decided to do Cut-out cookies, then after they bake, you can then decorate them for any occasion. My definition of sugar cookies, is that they are firm on the outside and soft in the inside. You have the hardness to withstand frosting, icing, and decorating.. but the softness of a really wonderful cookie.
Below are pictures of, Sugar Cookies decorated with royal icing and painted with food coloring. Not only a baker but as an artist, I wanted to create a scene on the cookies, totally different to what the cookie actually looks like.

Here we have pictures of Jam Drops: strawberry, raspberry, apricot, and orange marmalade, covered with chopped almonds.


As you can see, I am a real cookie fan..lol. These Jam Drops, which are alittle different then the normal drops people might be use to, were covered with chopped almonds and made a little more thicker. Any jam is fine, whatever is your favorite brand and flavor.. go right ahead and get started. I used Smuckers for all the different flavors, and an added bonus would be to sprinkle some royal icing over them..hmm so good!

Next are pictures of homemade Biscotti, Milk & Dark Chocolate Almond Biscotti.


I never knew what biscotti was until I tried some from my mom, and I must admit, the store bought ones were actually good. There was alot of chocolate and almonds, and it was hard but good! Its almost like eating sweet bread with lots of chocolate and almonds. So, as an aspiring baker, I decided to make my own. The pictures, is a result of my first try.. in which I was not sure how they were suppose to come out or taste. Im not just saying this, but they were a hit.. even though I do need some more practice. Biscotti's usually go with tea or coffee, and can be made into whatever your heart desires. If you are into health foods, or would like a snack with less sugar, this is for you. There are many ingredients you can add and infuse, candy, chocolate, nuts, savory, healthly..anything.

The Beginning!

We express ourselves through cooking, the types of food we eat, writing, laughing, crying and so on. Through cooking and food, whether conciously or unconciously..we express our mood, culture and/or experience.

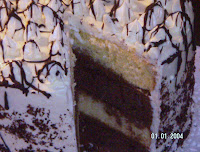
Below we have a homemade four layered Vanilla and Chocolate Cake, with chocolate buttercream filling, Vanilla Buttercream Icing and Unsweetened Dark chocolate swirled over the top. This was my first attempt to produce a professional looking cake, which ended up becoming a four layer cake. As you can see the layers are uneven, but it tasted great. Cooking and Baking is a passion of mines, and everyday I experiment with different ingredients.


To produce a cake simular to this, experience is not needed.. 1.the best way is to buy the same, one or two different types of cake mix, and follow the directions. 2.After following the directions, divide the batter between four 8 or 9 inch pans, two large size cake pans (which can be cut into halves), or one small single pan (to get a feel for it, first) and bake. 3.To get a flush fit, when cakes have cool and are now ready to stack on one another, simply cut off any round tops of the cakes.. so the surface of the cake is flat. 4.And if the sides seem to need alittle trim, go ahead and trim the sides of the cake, when stacked. 5.Next would be either two or three store bought icings or homemade buttercream.